Putting some quick notes up regarding configuration of a MikroTik device to behave like a consumer router, where accessing the router from inside accesses the router, and accessing the WAN IP from either inside or outside accesses an internal host via port forwarding. Continue reading “Configuring MikroTik RouterOS’s firewall, NAT, and DNS to act like a consumer router”
The latest incarnation of my mainframe
So, I finished resurrecting my mainframe the other day.
When I was in Kansas City for KansasFest, I bought an RS/6000 7011-250, which uses the smallest chassis capable of holding 32-bit MCA cards that IBM ever produced – for comparison, I’d say it’s about the size of a Quadro 610 or Power Mac 6100, albeit a bit deeper. (It was also the first PowerPC machine ever produced (predating the PowerPC Macs by a few months), using a 66 or (in my machine) 80 MHz CPU.) This allowed me to physically downsize the machine significantly with minimal loss in functionality.
I installed the P/390 card set and installed AIX while at KansasFest, but was unable to get the mainframe actually running for several reasons. Ended up putting the project on hold for various reasons (including building the Mimeo).
Lately, decided to get back at it. Continue reading “The latest incarnation of my mainframe”
Matias Tactile Pro 4 keyboard review
I’ve wanted to try Matias’s new keyswitches since I’ve heard of their release, and finally, decided to go ahead and get a Tactile Pro 4, as my local Micro Center had them in stock.
Matias has developed their own clone, the Matias Click switch, of the Alps SKCM tactile keyboard switch (specifically, the simplified white version), and installed it in their long-running (Mac-optimized) Tactile Pro series, creating the Tactile Pro 4. The previous model, the Tactile Pro 3, used Fuhua switches, and in my opinion, these switches had downright terrible quality. They’ve also cloned the SKCM cream switch, which had rubber damping, as the Matias Quiet Click switch, and are using it in the new Quiet Pro keyboard, although I’m not reviewing that switch.
So, I don’t typically review keyboards on this blog, and I’m not sure why I haven’t. So, here goes. Continue reading “Matias Tactile Pro 4 keyboard review”
WOOOOOOOOO(ish)!!!!!
Decided to build the AC side of the power supply today. Powered on, voltages looked good, no magic smoke, nothing getting hot.
That went well, so I decided to stuff the video section and power it on again. (Pardon the filthy monitor, I had to grab an old clunker from my storage unit, I didn’t want to risk the Dell 2001FP, nor did I expect it to take that signal well.)
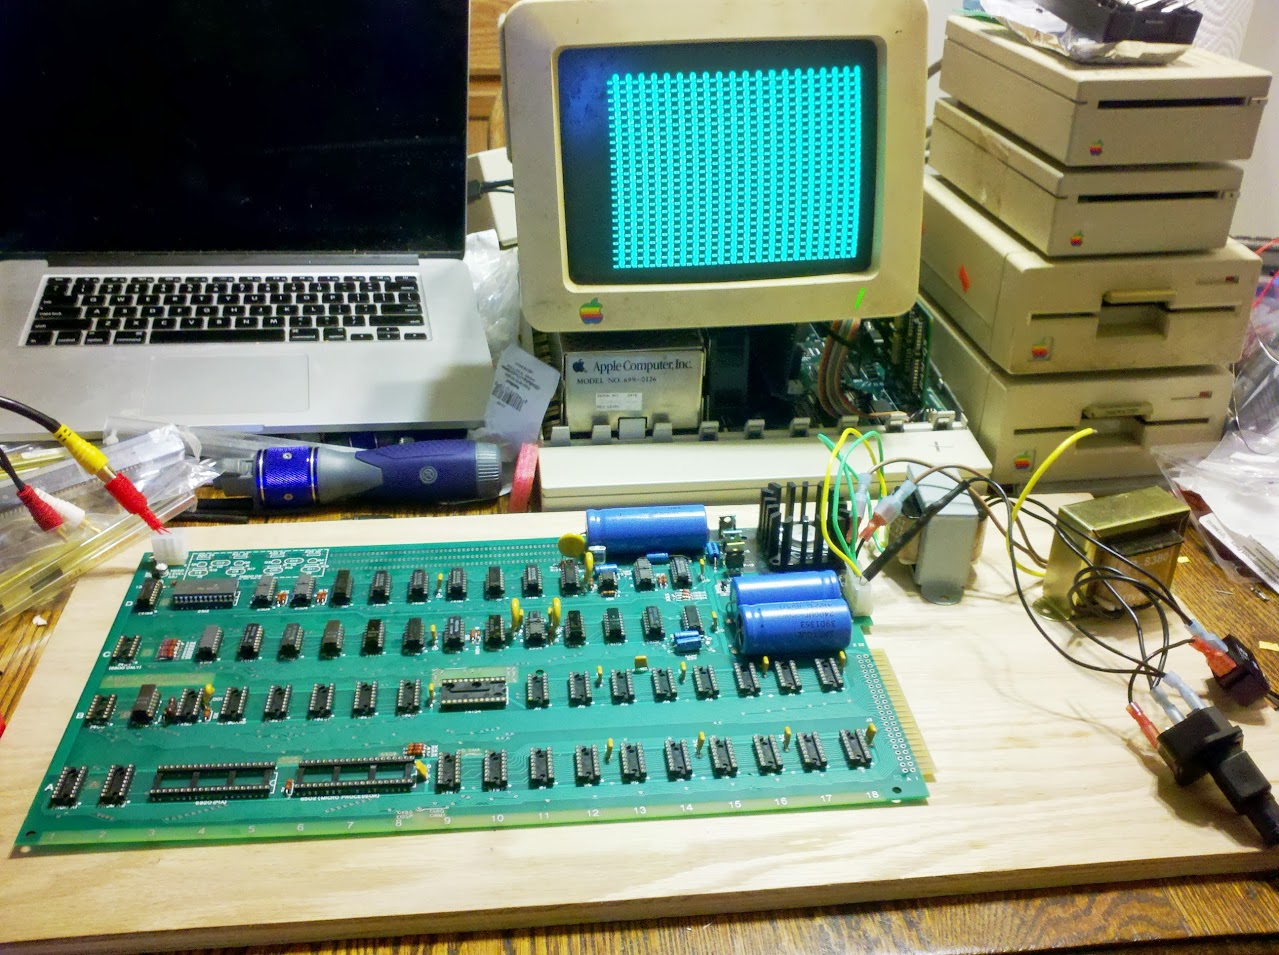
Clearing the video had an interesting problem, though – once I removed the clear jumper and the video returned, the underscores went away, but the blinking @ signs didn’t!
Anyway, I decided to continue onto the processor section – the video section behaving like that was actually promising, because it was almost all working.
Resetting the processor showed that it was definitely working, and the video section was even responding to the processor section – a line of @ signs would get replaced by slashes, for instance.
With a study of the schematic, I decided to figure out what would cause this problem… and decided to swap the 2504 that holds cursor position with one of the ones that holds character bits. Sure enough, the problem moved:
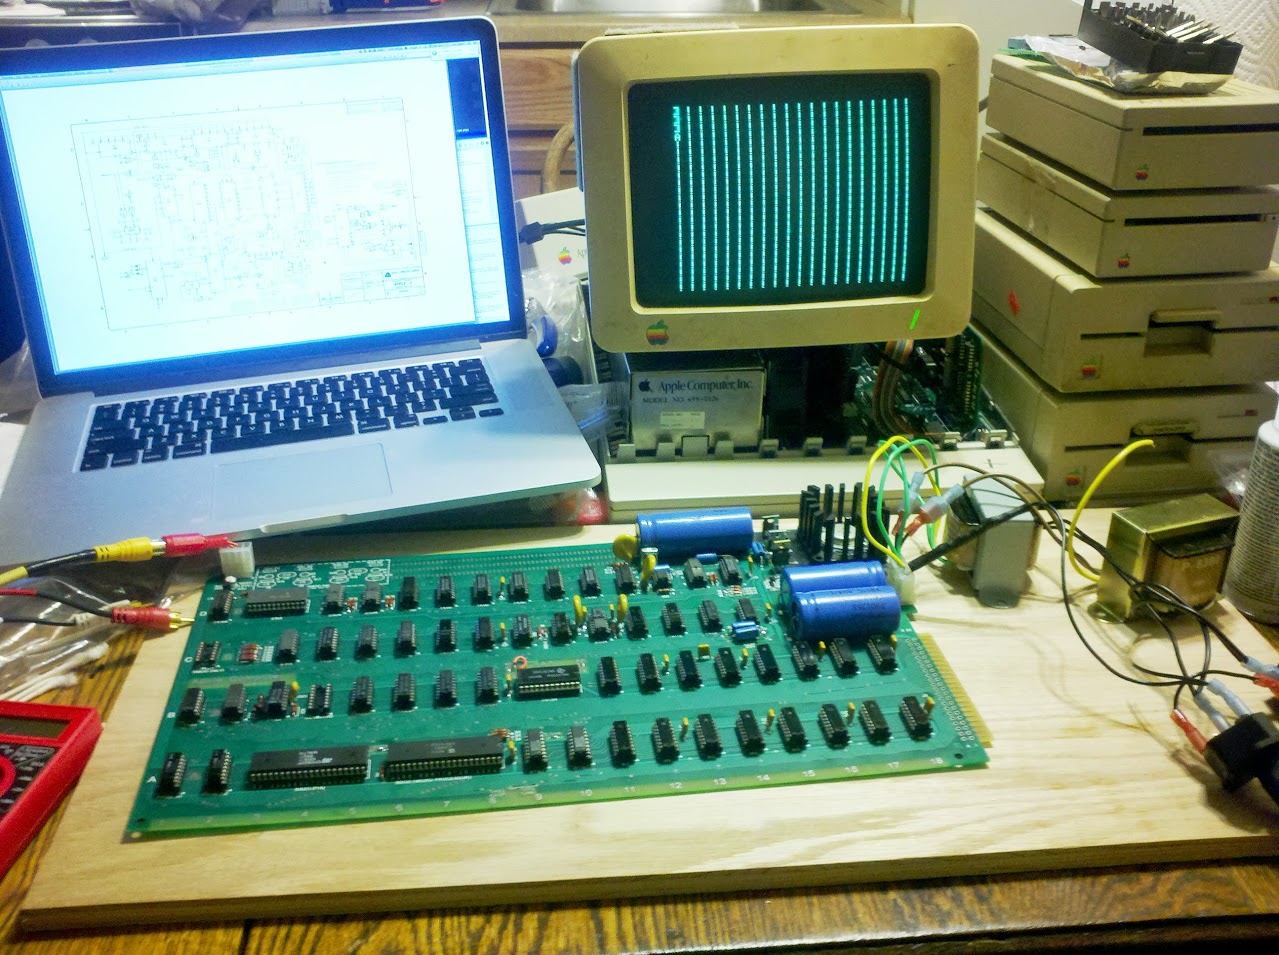
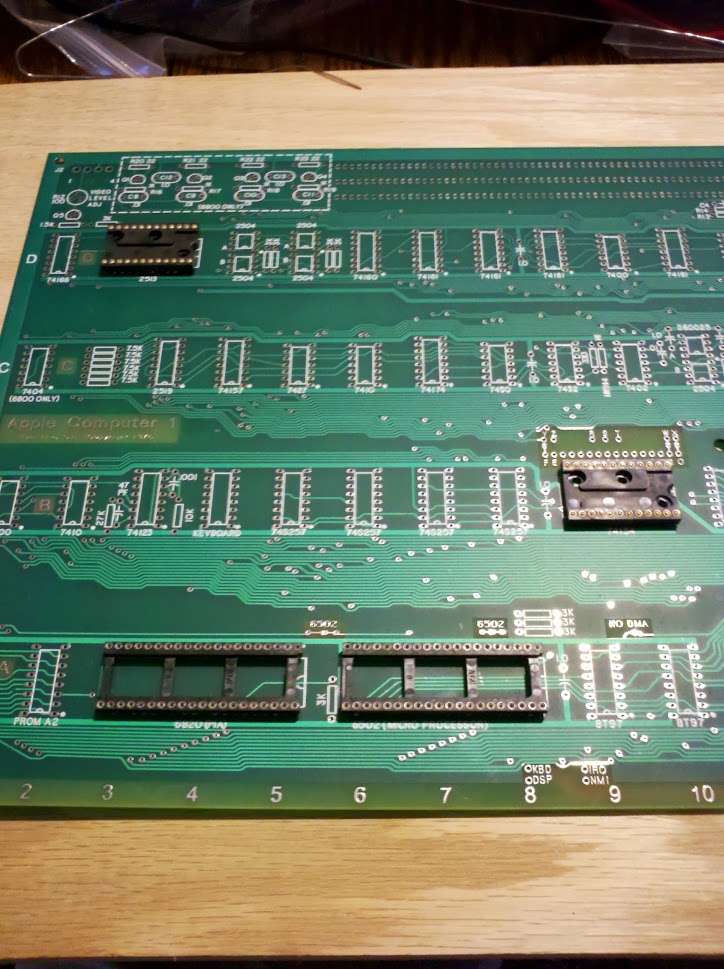
So, I now have a working(ish) Apple-1 clone. Tomorrow’s project will be to put the finishing touches on the board – solder the slot connector on, solder jumpers for the cassette interface and BASIC RAM, install the ACI, and celebrate (even though that shift register needs replaced).
The project won’t be done, though (and the computer won’t really be usable until some of this is done, and it definitely won’t be safe due to the AC section being exposed) – I need to get a keyboard encoder (waiting on a solution for that one), get a slot expander, wait for the CFFA1 to arrive, and work on my case (which will be a stained oak base, with 4″ aluminum standoffs supporting a plexiglas top above the board and power supply, and a plexi case around the AC section of the power supply). Also, I’ll do a similar, much smaller case for the ][ Plus keyboard.
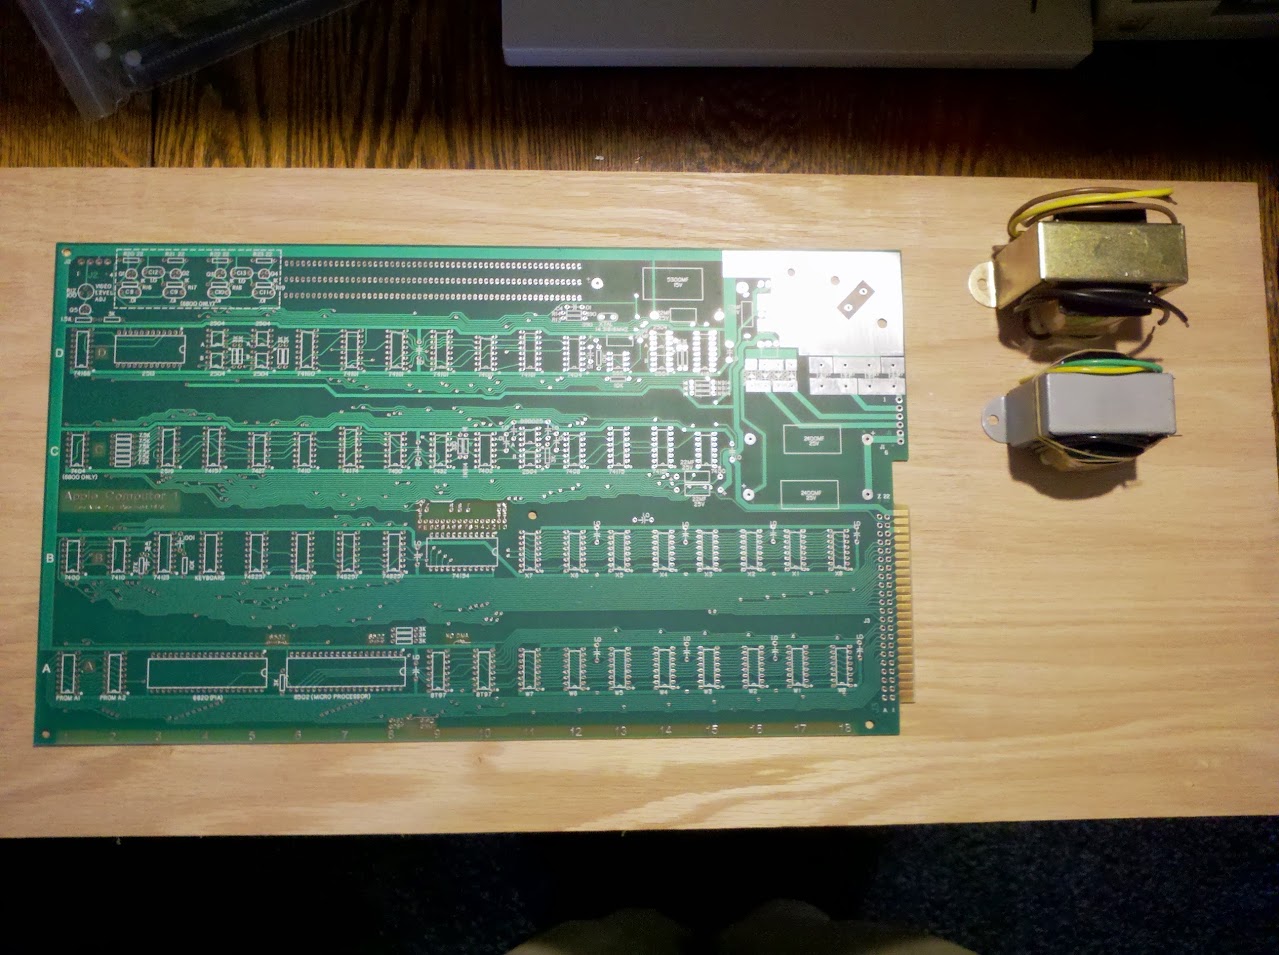
All soldering except slot connector COMPLETE!
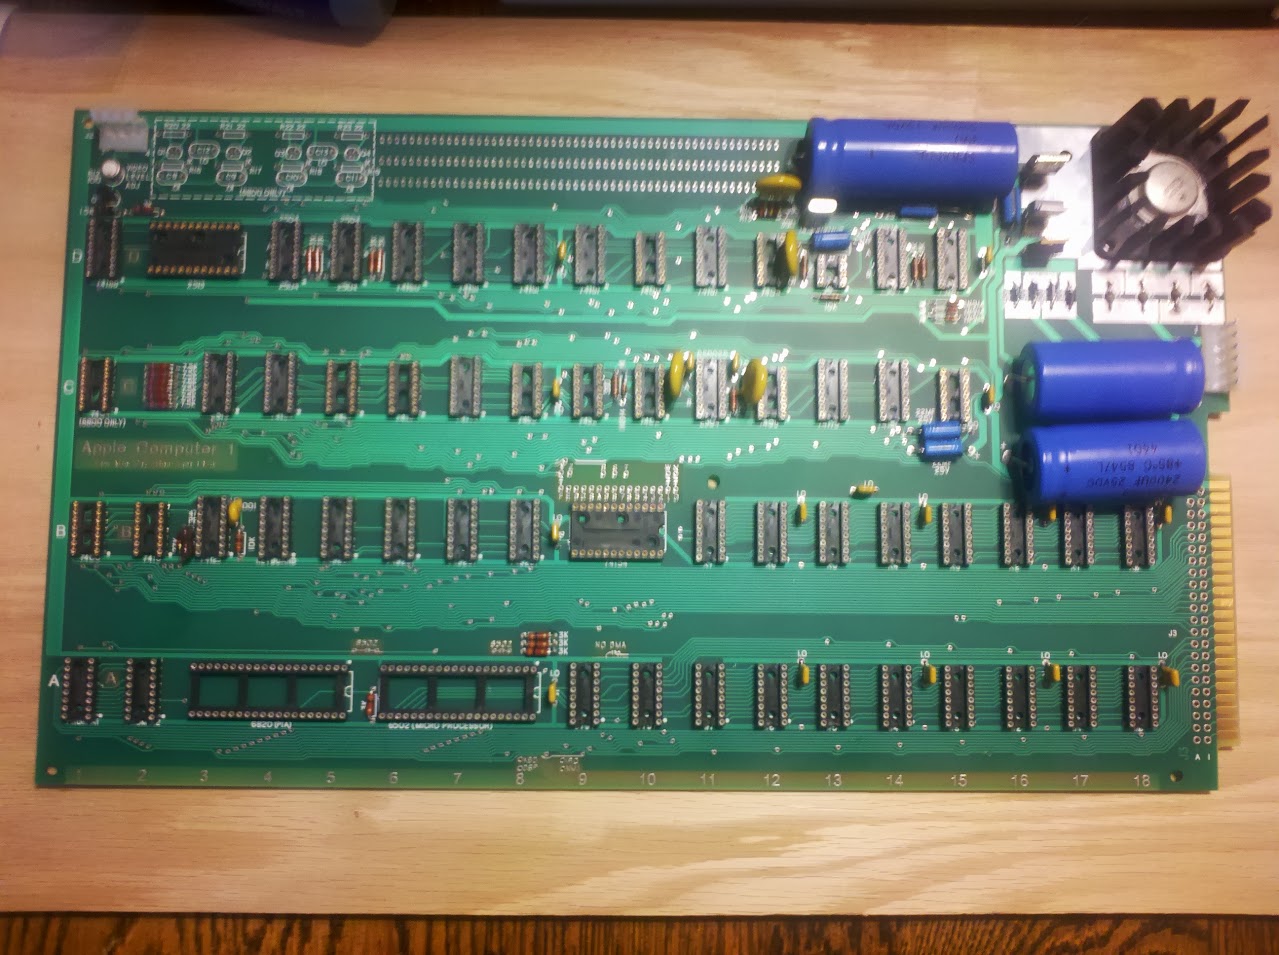
I know, it’s an out of focus cell phone shot, but I’ve already got it drying after cleaning the flux, and don’t want to take another shot.
Resolution on the capacitor issue was simply going ahead and using the supplied caps, as they should not negatively (and may positively) affect function, and will only negatively affect authenticity, of which this has none anyway, so…
Yes, I got the top 2400 µF cap so that you can’t read the printing on it. Purely a cosmetic issue, kicking myself for doing it, and I caught it too late to easily fix it. (I could obviously fix it now, but it’d generally be a pain, and some of that is on the ground plane section of the power supply, which is a bear. Not as bad as the 7905’s ground section, but bad.)
Plan for tomorrow: build the AC side of the power supply (that is, wire up the transformers), and go for first power up to test the power supply section.
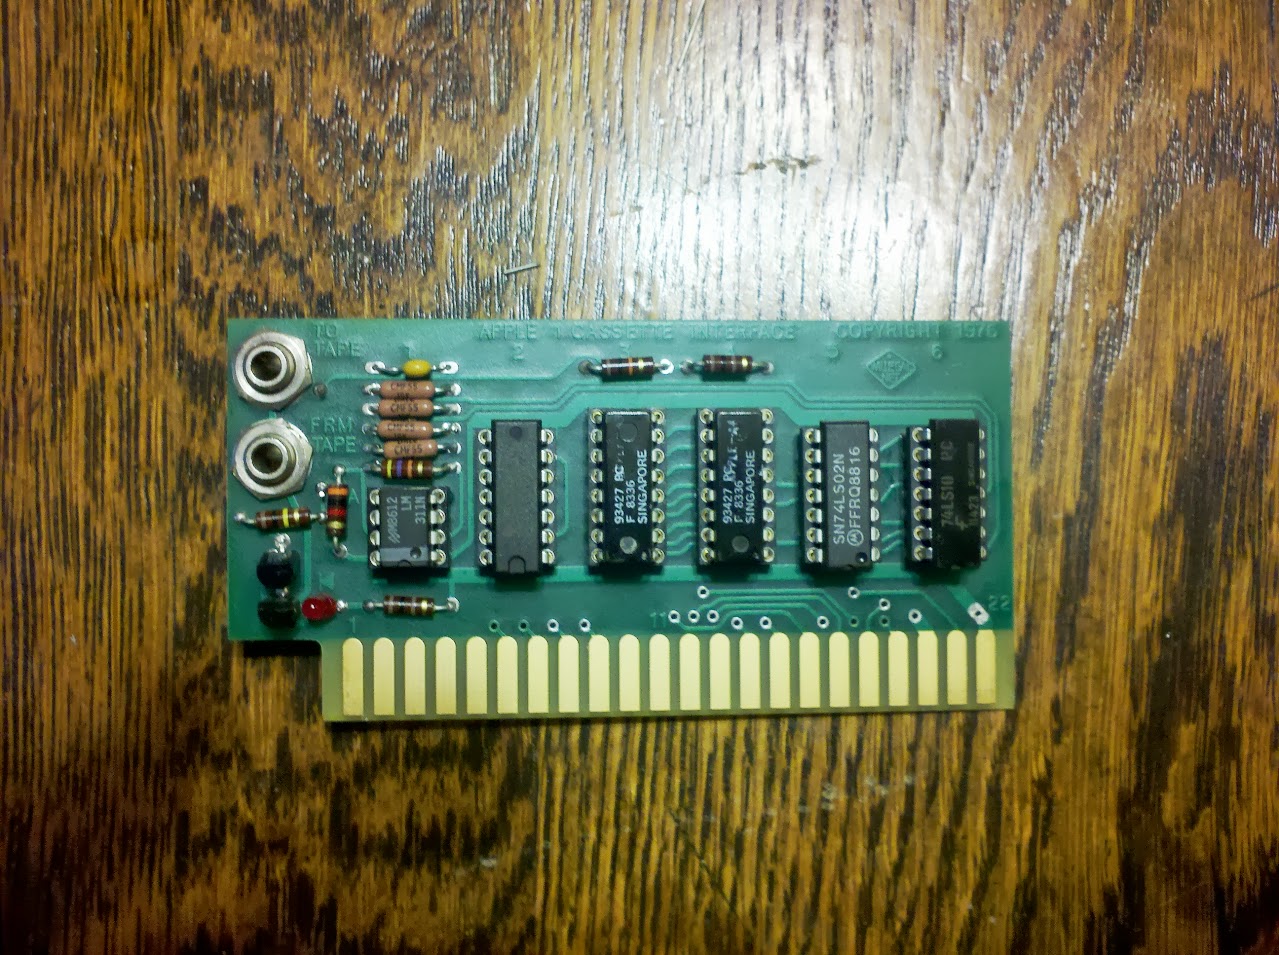
Built the cassette interface
I’m still waiting on resolution for the capacitor issue, but I decided that I might as well build the cassette interface.
Hit a stopping point due to wrong components…
All sockets are in, so I’m to chapter 2, step 10 of the assembly guide – the installation of the seventeen 0.1 µF decoupling capacitors.
Here’s the problem: Unicorn shipped 1.0 µF caps. This matches the silkscreen on the PCB, but the Mimeo manual makes a point of mentioning that real Apple-1 computers used 0.1 µF instead. I could actually install the incorrect caps, and it’d probably be fine, but I’ll wait for Unicorn.
In any case, step 11 (installing the other six small caps) isn’t actually dependent on step 10, so I went ahead and did it. The next step is another power/ground short check, and while I could easily continue on (really, if I wanted to, all the way to initial power-up, because the decoupling caps aren’t a factor until I start stuffing chips in), I figure it’s best to stop here, so I don’t deviate too far from the manual (and then have more work to do to diagnose a fault if I do mess up).
And all the 16-pin sockets are in… that went faster than expected.
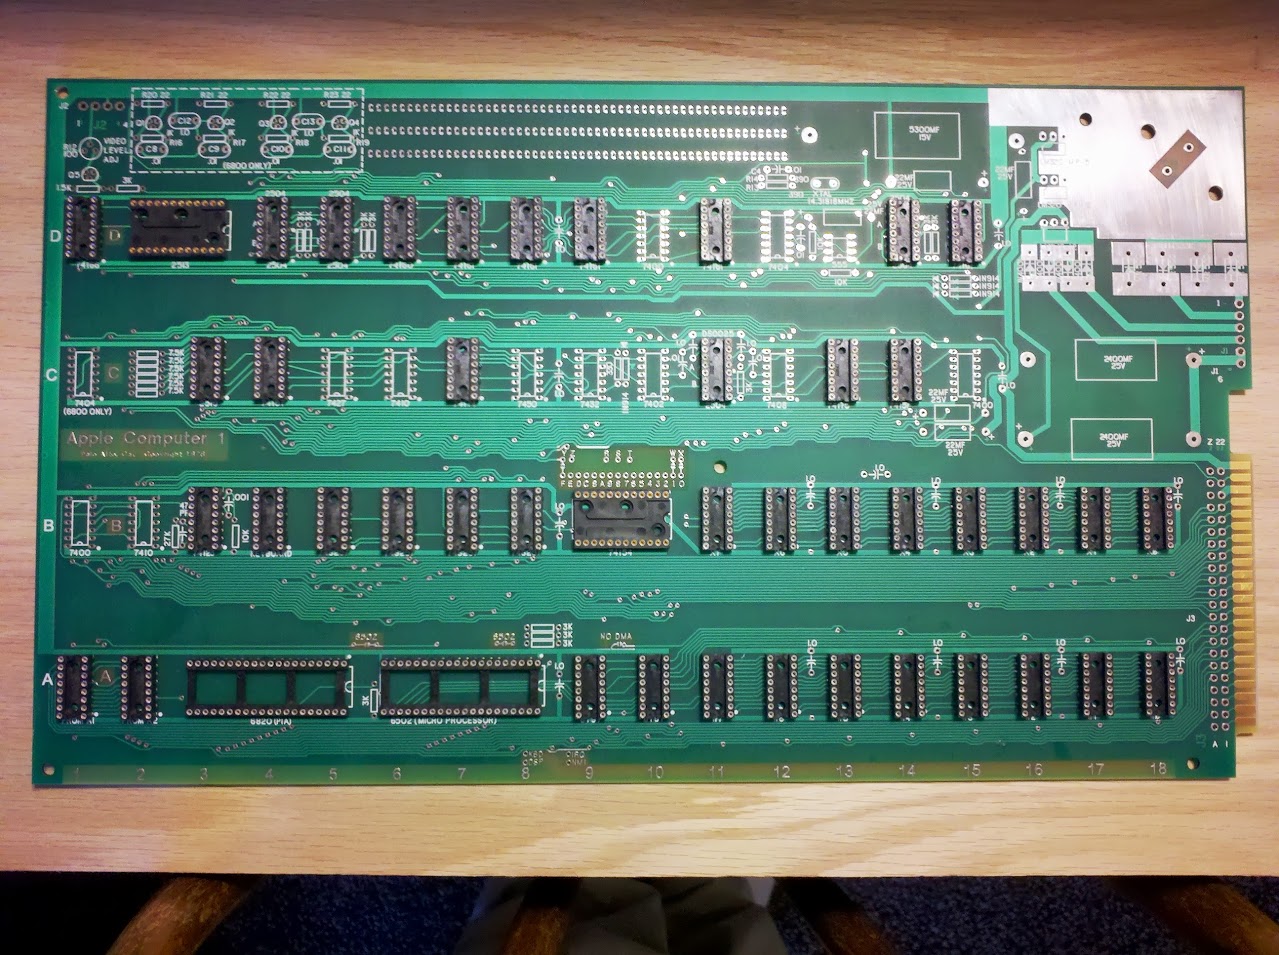
800 solder joints to date. 176 more to go to get the rest of the sockets in, then it’s on to the discrete components.
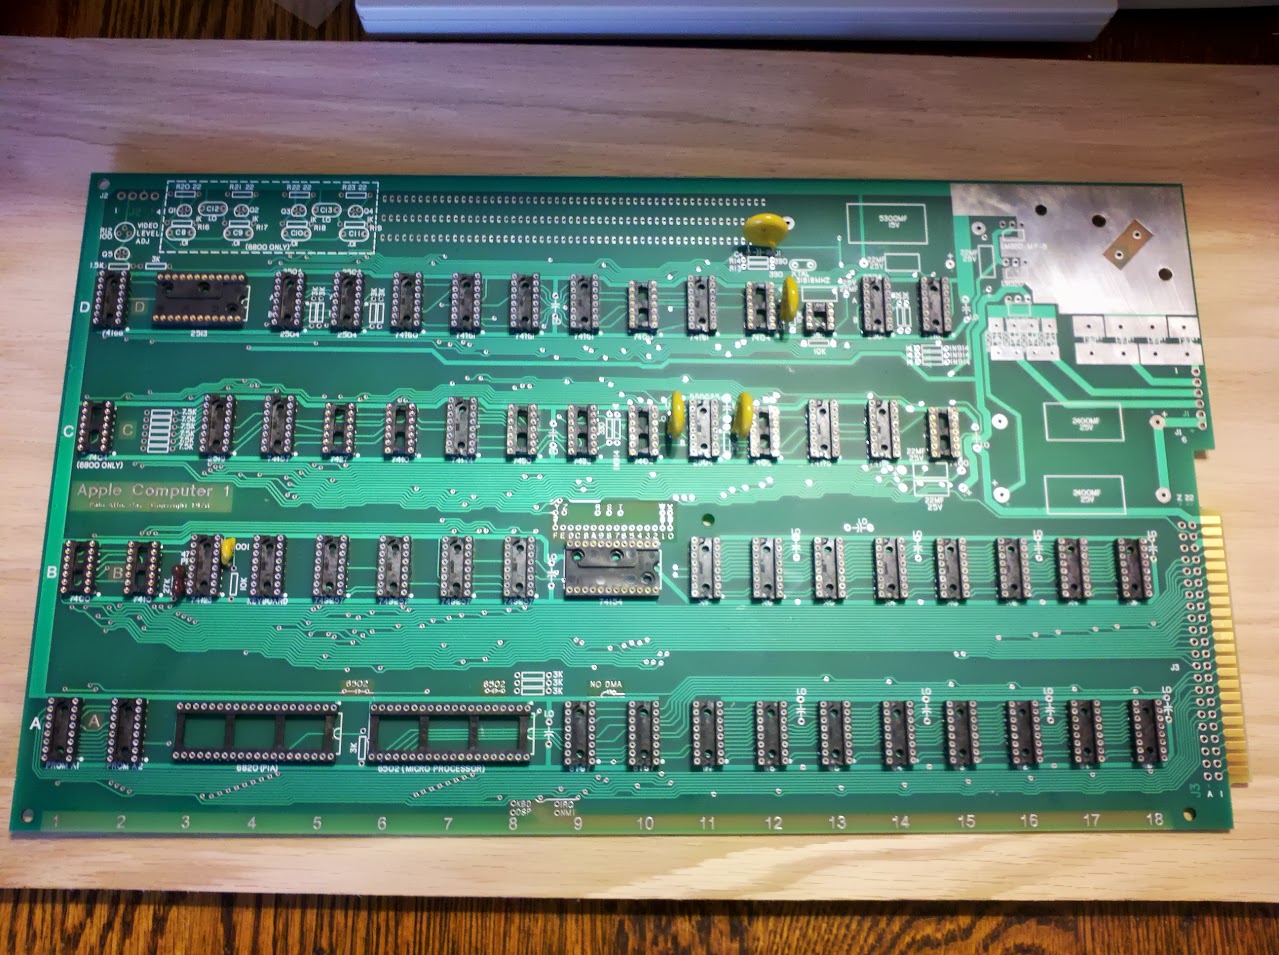
Just received my Mimeo-1 PCB from Mike Willegal!
That is all.
Update: Decided to start soldering. Finished chapter 2, steps through 5, of the Mimeo assembly and bring up guide (PDF).
Now that is all for today. Tomorrow’s plan: install twelve 16-pin sockets in row A, and we’ll see how I feel about doing row B’s fourteen 16-pin sockets. It’ll be a total of 42 sockets to finish chapter 2, step 6, although I’m definitely not doing all 42 sockets tomorrow.
Beginning a Mimeo build
Just thought I’d throw a quick post up… I’m going to be starting a Mimeo build very soon. (For those unfamiliar with the Mimeo, it is a (rather faithful) clone of the original Apple-1, Apple’s first computer. I got to use the real thing at KansasFest 2013, thanks to Chris from Chicago, and caught the bug.)
What all have I bought so far…
- Mimeo PCB, PROMs, and ACI replica from Mike Willegal – still waiting on that
- Panasonic RQ-2102 cassette recorder. I did find out that this is not the cassette recorder that Apple recommended in 1976 (it appears to have come out in 1994, in fact), contrary to what’s floating around, but it is one that apparently works quite well with the Apple Cassette Interface.
- Apple-1 parts kit from Unicorn Electronics – that shipped lightning fast, sitting on my kitchen table now, although I need to check the BOM against what shipped just to be safe
- Various odds and ends for the power section (mostly from Digikey) – well, I just ordered those, so except for the couple things I got locally today…
- Oak plywood to use as a base to mount all of this on – needs to be stained to look better, but I think it’ll be decent
What I still need to buy…
- Replacement encoder for the ][+ keyboard that I have – many years ago, I was given a ][+ that had been (even more years before that) converted into a (cheap) analog clock. Machine was gutted, hole drilled in the lid to install the clock guts. So, it’s a damaged case, and a keyboard – I don’t feel bad about taking the keyboard (the lid is the interesting bit anyway as far as this particular machine’s history goes). Unfortunately, when it was gutted, the encoder was taken. There’s a couple options I’ve got here – Vince Briel sells the Apple II Super Encoder, and Wendell Sander once did an Apple-1 specific encoder for the Apple II keyboard – I need to see if he still has any.
- Plexiglas cover. My ideas for the enclosure are extremely minimal – wood base, with everything mounted to it, some nice tall standoffs (about 4 inches), and a plexiglas cover.
- Plexiglas box around the power components. (Das 120-Volt-Komponenten sind nicht für gefingerpoken!) This will need to be laser cut, and will provide mounting for the fan (I don’t trust those power components to stay cool otherwise), power socket, and power switch.
- Vince Briel’s Slot 1 Expander (listed on the page for his Replica 1 (which is not a replica, but it is compatible with the Apple-1)) – not needed, but nice to have, and I’ve got a nice place for it in my planned case layout. And it makes some plans for Apple-1 shenanigans a little easier. 😉
- Maybe a CFFA1? But I don’t strictly need that…
I’ll be posting more status updates as I make progress along the path to owning a computer 1976-style.